In this article, you will find a detailed guide for Zoho CRM account administrators on installing and using the ScriptCaller app in Zoho CRM.
Instruction for Installing the ScriptCaller App from Zoho CRM Marketplace
1. Log in to Zoho CRM
- Go to the Zoho CRM website and log in to your account.
- Make sure you have administrator rights, as only administrators can install apps from the marketplace.
-
Would you like to start using ScriptCaller right away? You don’t have to wait for marketplace navigation — just choose your Zoho region below and install the extension directly from here.
This option is perfect for administrators who want to quickly enable the ScriptCaller integration and begin configuring call scripts today.
Zoho Europe Zoho Australia Zoho India Zoho China Zoho Japan Zoho USA Zoho Canada Zoho Saudi Arabia
2. Access Zoho Marketplace
- In the main menu of Zoho CRM, find the "Marketplace" section and navigate to it.
3. Search for the ScriptCaller App
- In the search bar on the Marketplace page, enter "ScriptCaller".
- Select the ScriptCaller app from the dropdown list of results.
4. Install the App
- On the app page, click the "Install" button.
- Review the required permissions and terms of use. If you agree, click "Accept and Continue".
 Follow the prompts in the installation wizard.
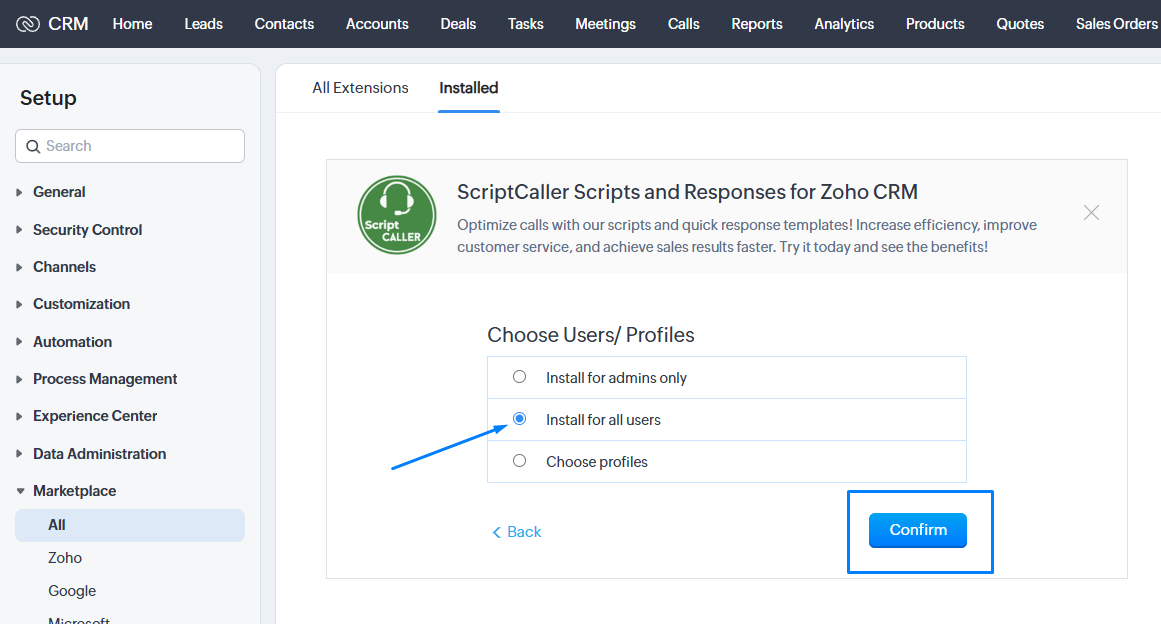
5. Set Up Employee Access
- After installation, a window for configuring access rights will appear.
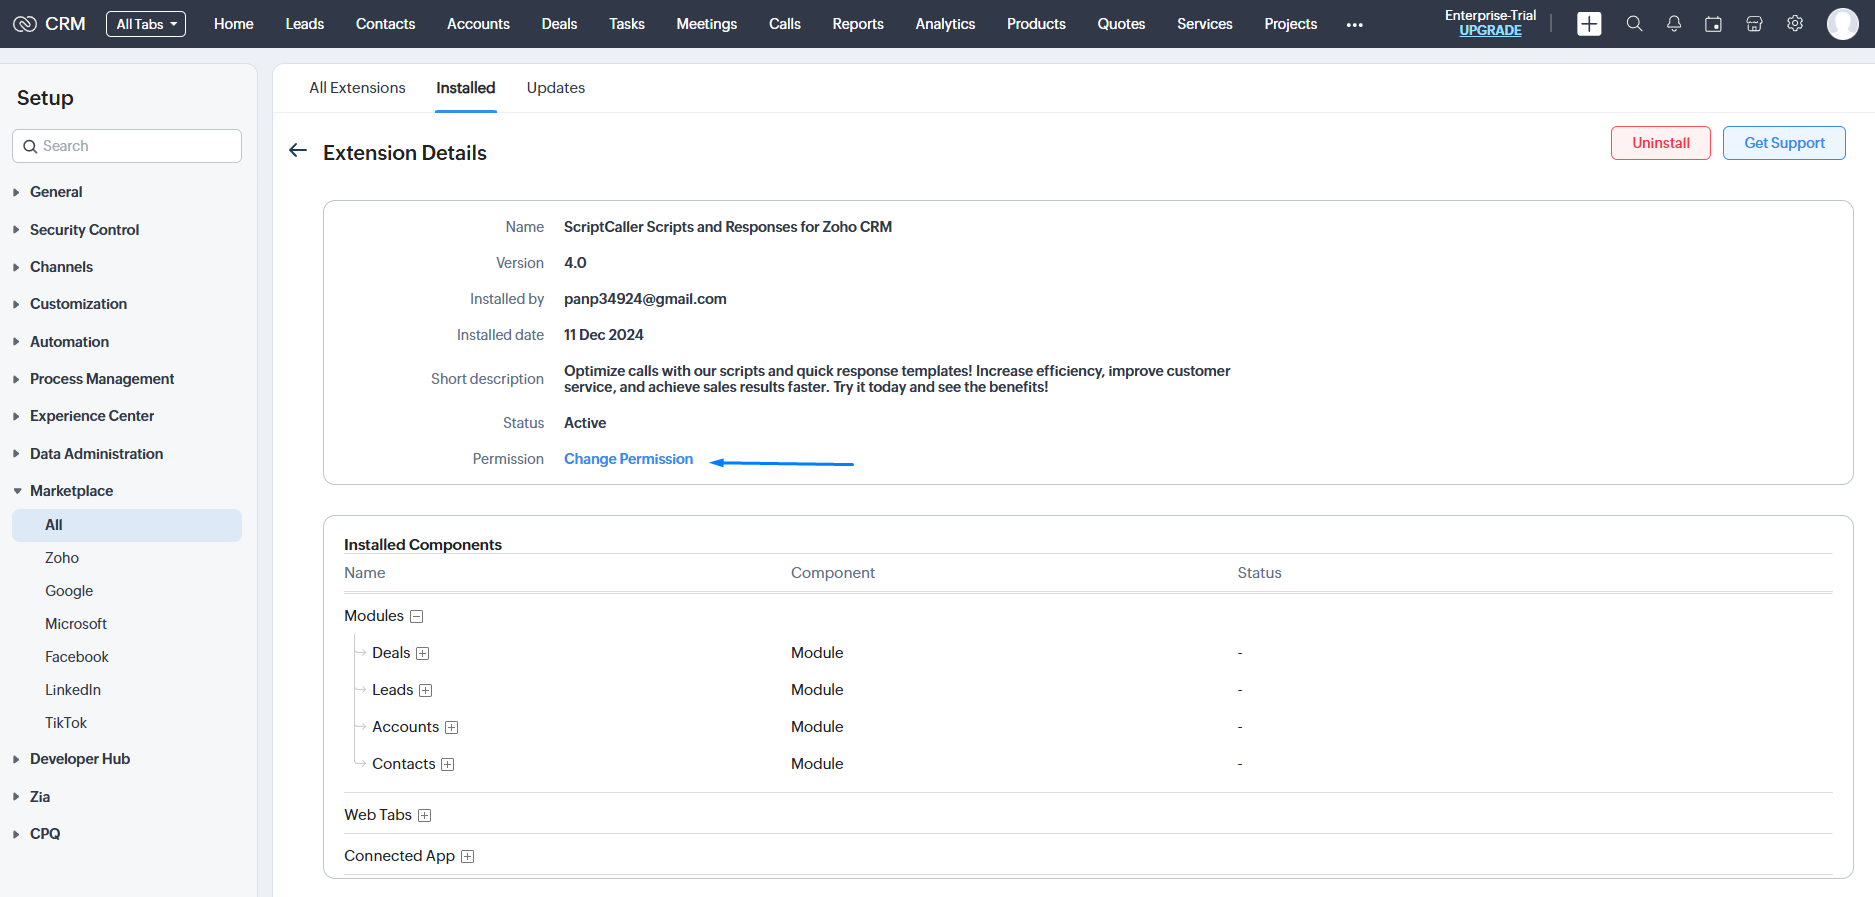 Select the users who will have access to the app.
Note: Fine-tuning access rights to different parts of the application can be done later on the ScriptCaller website in the "Team" section (The link is available for authorized users).
Save the settings by clicking the "Apply" button.
6. Complete the Installation
- Once installed, the app will appear in the "Apps" section of your Zoho CRM.
- You’ll see the ScriptCaller icon in the main menu or dashboard, as well as in entity cards and lists (contacts, companies, leads, and deals).


7. Initial ScriptCaller Setup
- Open the ScriptCaller website in a browser tab.
- Upon the first launch of the application, the system will prompt you to log in to the service (if you already have an account with ScriptCaller) or to go through the registration process. Choose the appropriate option, such as registration.

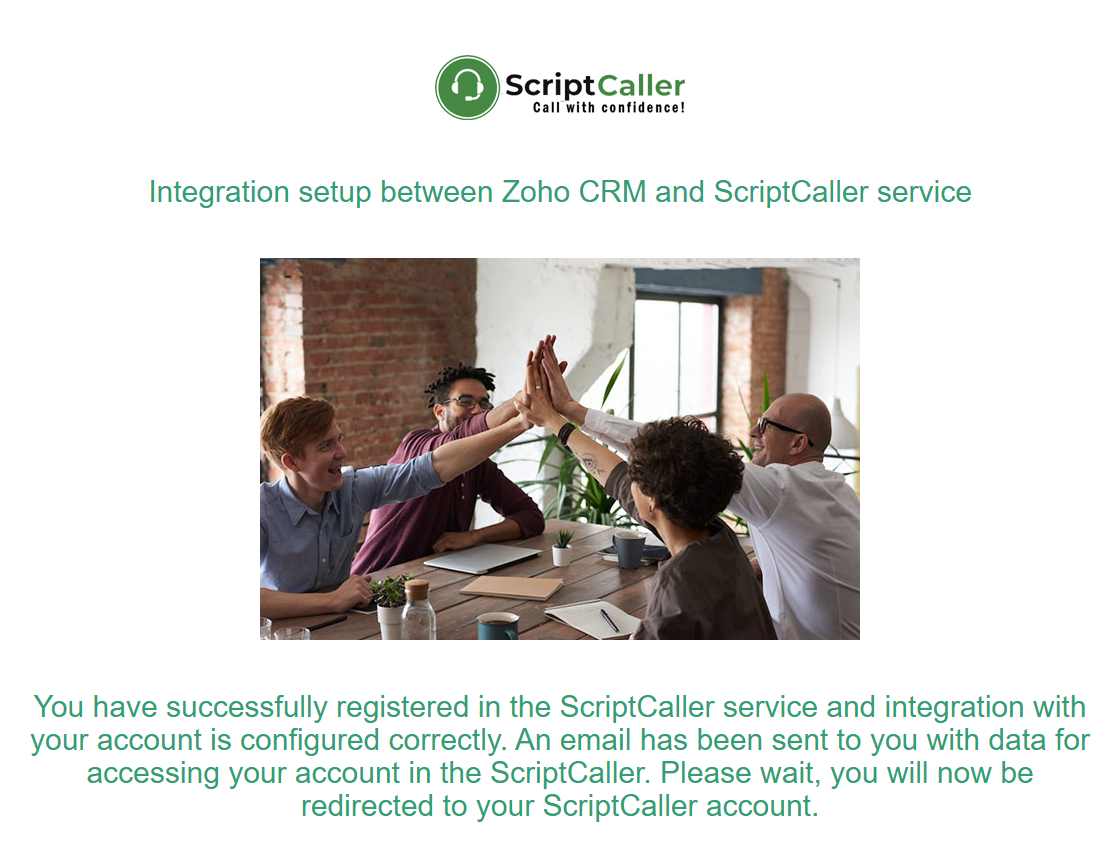
- Once completed, you will receive a notification and will be automatically redirected to the scripts page.
- Сreate your first script or download a test script for Zoho CRM. The test script comes with preconfigured standard fields for contacts, companies, deals, and leads.
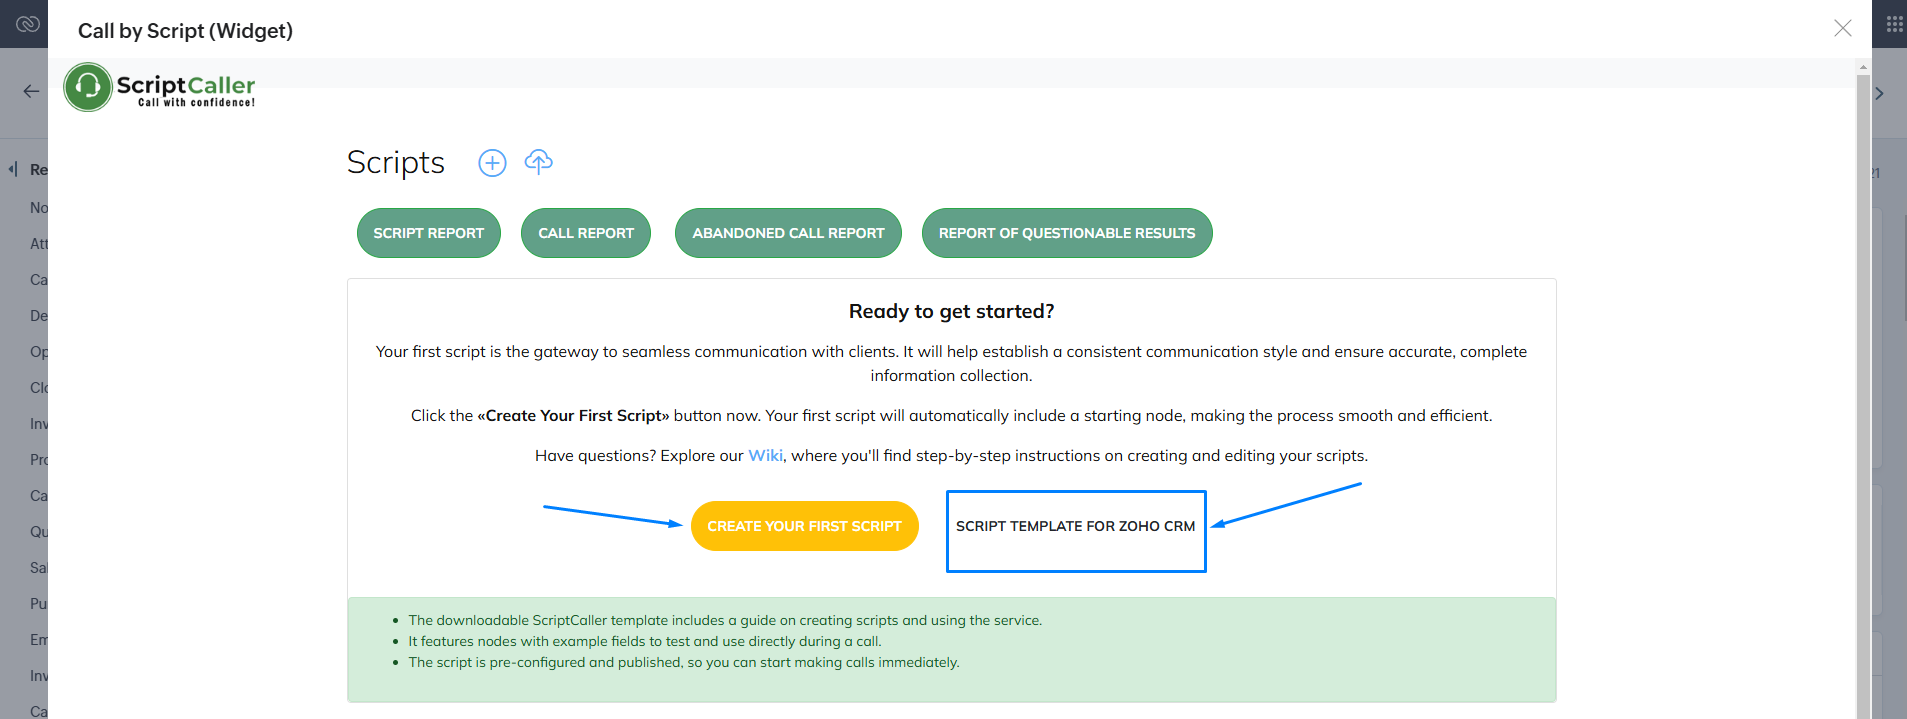
- When you install a test script, the system will automatically create the fields required for the script to function in your Zoho CRM account within ScriptCaller. Later, you can import any missing fields from the "Fields" section (The link is available for authorized users) or directly within the editor mode while editing the script.
8. Verify the App's Functionality
- Ensure the app is properly integrated with your CRM. Open the "Integrations - Zoho" section on the ScriptCaller website and verify the integration settings. If the integration is missing, reinstall the app from the Marketplace or contact ScriptCaller support.
- Go to the ScriptCaller application in Zoho CRM and open it as a widget from any entity card or list (contacts, companies, leads, or deals).

- Start a call using the script and navigate to the node with test data. You should see populated fields from the card of the entity where the call was initiated.

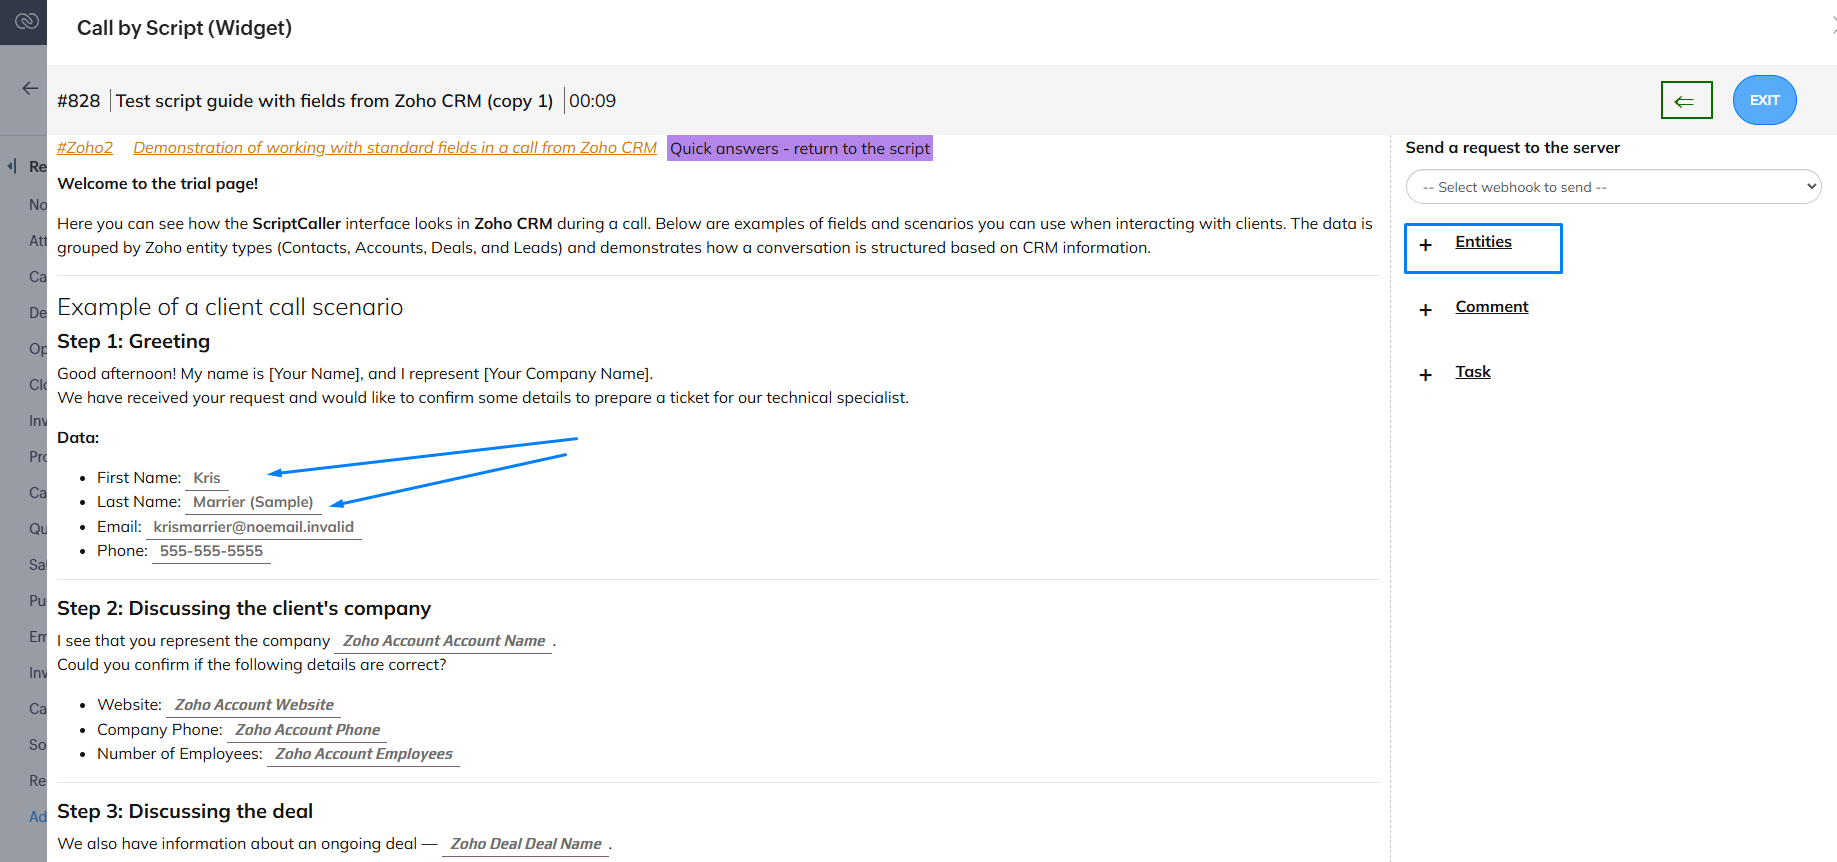
- Test the functionality of related entities. Open the "Entities" section. For example, if you opened the app from a contact card that is linked to an account, you will see this. If the related entity is missing (such as a lead), you can create it. For deals, both editing an existing related deal and creating a new deal are supported.
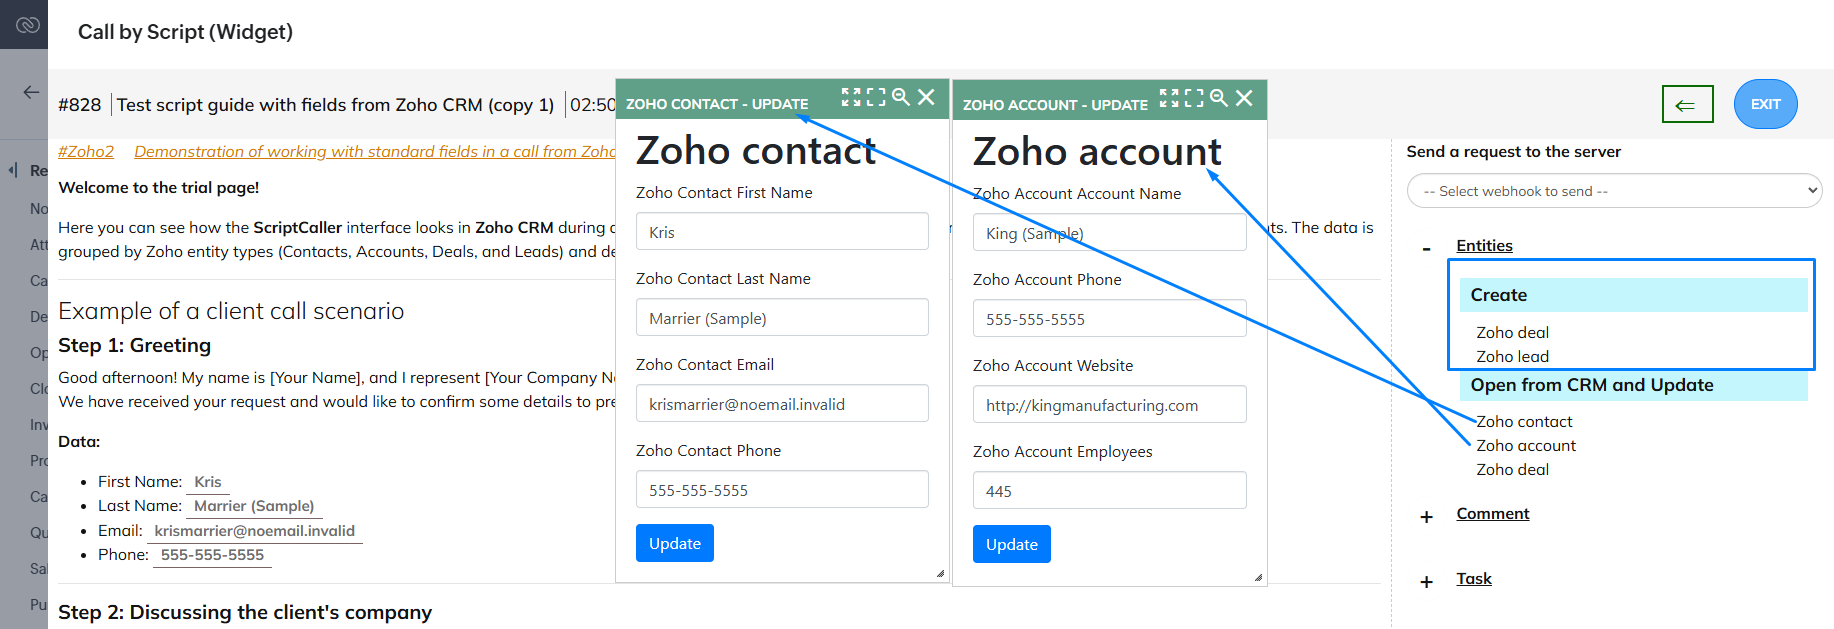
- Modify any field for testing purposes (e.g., company name, contact name, etc.).
- Field data is saved automatically as soon as the cursor leaves the field. The operator can click on another field or an empty area in the node to trigger the save.
- Complete the call and close the app.
- Refresh the Zoho CRM page to ensure all changes were successfully applied to the entity card.

9. Creating a Server-to-Server Integration Between Zoho CRM and ScriptCaller
To enable the functionality of ScriptCaller in a separate window and ensure seamless synchronization between Zoho CRM and ScriptCaller, you need to set up a server-to-server integration. This integration allows the application to access and work with your CRM data effectively.
Step-by-Step Guide:
- Go to the "Integrations" section on the ScriptCaller website.
- Connect your Zoho CRM account.
- After clicking the button, you will be redirected to the Zoho authorization page.
- Select the Zoho CRM account you want to connect to ScriptCaller.
- Grant the required permissions.
- For ScriptCaller to function properly, it needs access to your CRM data, such as contacts, companies, deals, and leads.
- On the Zoho page, click "Accept" to grant the necessary permissions. You will receive a message about the successful creation of the integration.


What is OAuth2, and Why is It Needed?
OAuth2 is a modern and secure method for connecting applications. It allows ScriptCaller to access your Zoho CRM data without storing your credentials (username and password).
In simple terms, it’s like giving a friend a key to your house: you control what they can access and how long the key will work. In this case, you provide access only to specific CRM data, and its use is strictly limited.
What Happens After Setting Up the Integration?
- Data from your Zoho CRM will sync with ScriptCaller, enabling the following:
- Automatic loading of information from entity cards (contacts, companies, deals, leads).
- Editing data directly in the ScriptCaller interface, with changes saved instantly in Zoho CRM.
- Faster data processing and elimination of manual copy-pasting.
If you have any questions or encounter any difficulties, feel free to contact ScriptCaller support for assistance.
If everything works as expected, the ScriptCaller app is ready for use. You can now optimize customer interactions, automate calls, and improve your team’s productivity!
Create custom scripts tailored to your business needs, use quick reply templates, and smart links to speed up client interactions.
If you have any questions, visit the Wiki section for a detailed user guide, or contact our technical support team for assistance.
